Painting a Simple Cloud in Sumie: Softness and Movement
Sumie, the art of Japanese ink painting, is renowned for its ability to capture the essence of nature with minimal strokes. Among the most evocative subjects in Sumie is the cloud – ever-changing, ethereal, and imbued with a sense of tranquility. This article will guide you, a beginner, through painting a simple, yet expressive cloud using traditional techniques.
Understanding the Essence of Clouds in Sumie
Unlike representational Western painting, Sumie focuses on conveying the *feeling* of a subject, rather than a precise likeness. When painting clouds, this means focusing on their softness, their movement, and their atmospheric qualities. Think about how light filters through a cloud, how it obscures the background, and how its edges blur into the sky.
Before you begin, spend some time observing clouds. Notice how they morph and shift, how their edges are never perfectly defined. This observational practice is crucial to internalizing the spirit of Sumie.
Materials You'll Need
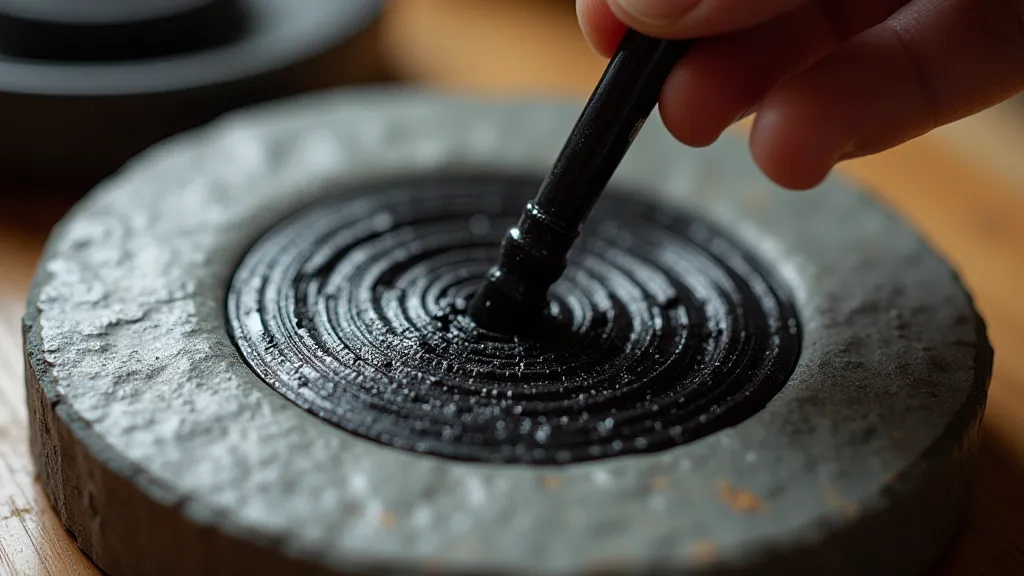
- Ink Stone (Suzuri): For grinding your ink.
- Ink Stick (Sumi): Traditional ink stick for grinding.
- Japanese Brush (Fude): A medium-sized round brush is ideal for cloud painting.
- Washi Paper (Japanese Paper): Washi paper’s absorbency allows for beautiful washes and subtle gradations.
- Water Container: For rinsing your brush.
- Paper Towel or Cloth: For blotting excess ink.
Step-by-Step Guide: Painting a Simple Cloud
Let's break down the process into manageable steps. Remember to focus on feeling and intuition rather than striving for perfection.
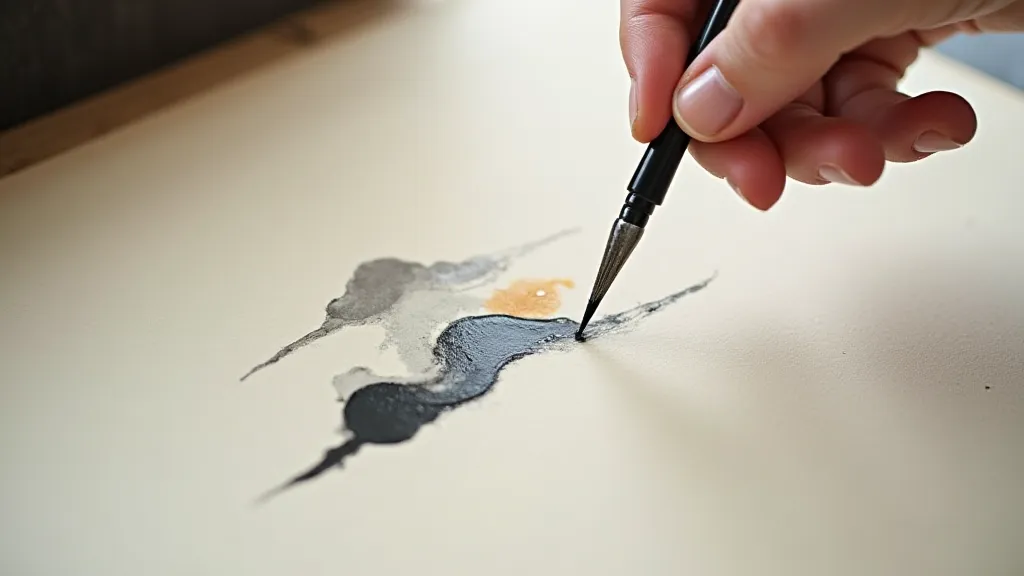
Step 1: Preparing Your Ink
Place a small amount of water into your ink stone. Gently grind the ink stick against the stone in a circular motion. The goal is to create a deep black ink, but you can dilute it with water to achieve lighter tones. For a cloud painting, a medium dilution works best – dark enough to see clearly, but light enough to create subtle washes.
Step 2: Initial Wash (The Base Cloud Form)
Dip your brush in the diluted ink. Lightly touch the paper and create a vague, irregular shape – this will be the base of your cloud. Don’t be tempted to make it too symmetrical or defined. Think about a large, amorphous shape drifting across the sky.
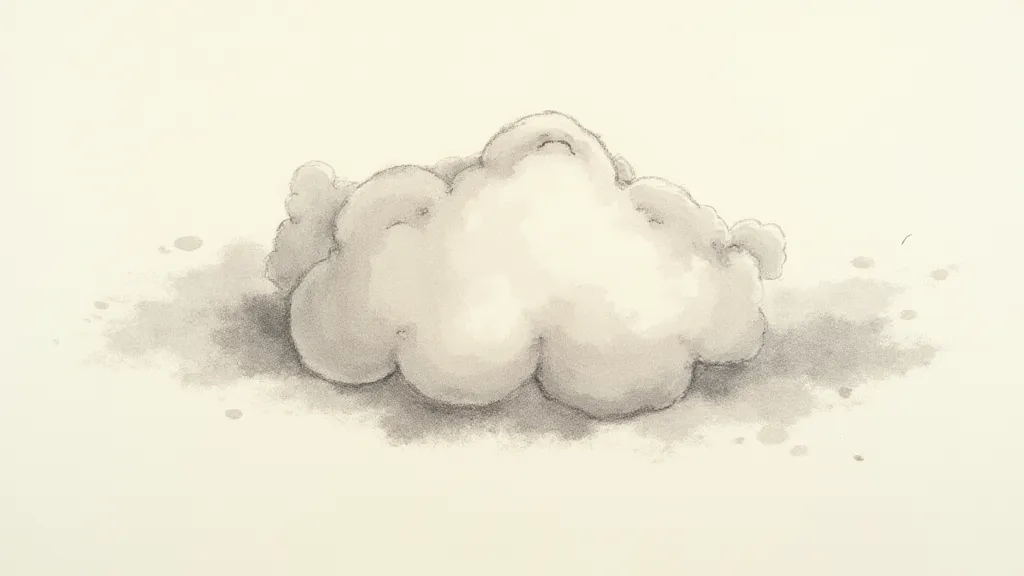
Step 3: Building Softness – The Gradation
This is where the magic happens. Dip your brush in ink again, but this time use less ink, blot your brush slightly, and begin to soften the edges of the cloud form. Apply thin layers of ink, gradually blurring the boundaries. Imagine the ink gently diffusing into the paper. This creates the characteristic softness of Sumie clouds.
Step 4: Adding Movement – Suggesting the Wind
To suggest movement, use your brush to create a few light, wispy strokes extending from the main cloud form. These should be very subtle – barely visible, just hinting at the wind’s influence. Don’t overdo it; simplicity is key.
Step 5: The Negative Space
Pay attention to the empty space *around* the cloud. This negative space is as important as the cloud itself. It gives the cloud room to breathe and contributes to the overall feeling of spaciousness and tranquility.
Step 6: Final Touches (Subtlety is Key)
Step back and observe your cloud painting. Are there any areas that feel too harsh or defined? Use a barely-inked brush to gently soften them. The goal is to create a painting that feels effortless and natural.
Conclusion
Painting clouds in Sumie is a meditative practice that cultivates observation, patience, and a deep appreciation for the beauty of nature. Don't be discouraged if your first attempts don't look exactly as you envisioned. The beauty of Sumie lies in its imperfections. Keep practicing, observing, and allowing the brush to flow with your intuition, and you’ll be well on your way to capturing the ephemeral grace of clouds.